Angular CDK Overlay Tutorial: Positioning
The Angular CDK Overlay is a handy, powerful, and fairly complex feature that can be used to quickly create modals and pop-ups. In my previous post about the CDK Overlay, I covered the basics needed to create both a modal using the global position strategy and a pop-up using the flexible connected to position strategy. I’d suggest that if you’re unfamiliar with the Overlay module at all, you go check out that post first because the demos in this video will build off the examples we built, and concepts that we learned. In this post we are going to learn about different ways to control how a pop-up gets positioned when using a connected overlay because there’s a lot to it and it’s all pretty cool.
We’ll learn how we can specify a desired position and then provide fallbacks when it can’t fit. We’ll learn how to force a pop-up into view when it won’t correctly fit within any of the provided positions. And lastly, we’ll look at how to handle a pop-up when it’s too large to display within the viewport. Alright, let’s get to it!
Understanding How the CDK Connected Overlay Positioning Works
When learning how the connected overlay works, we can’t really do much if we don’t understand how positioning works. So, let’s start with that.
If we recall from my previous post about overlays, the connected overlay has an origin which is the item that we will position relative to, and the overlay which is the pop-up we will be positioning.
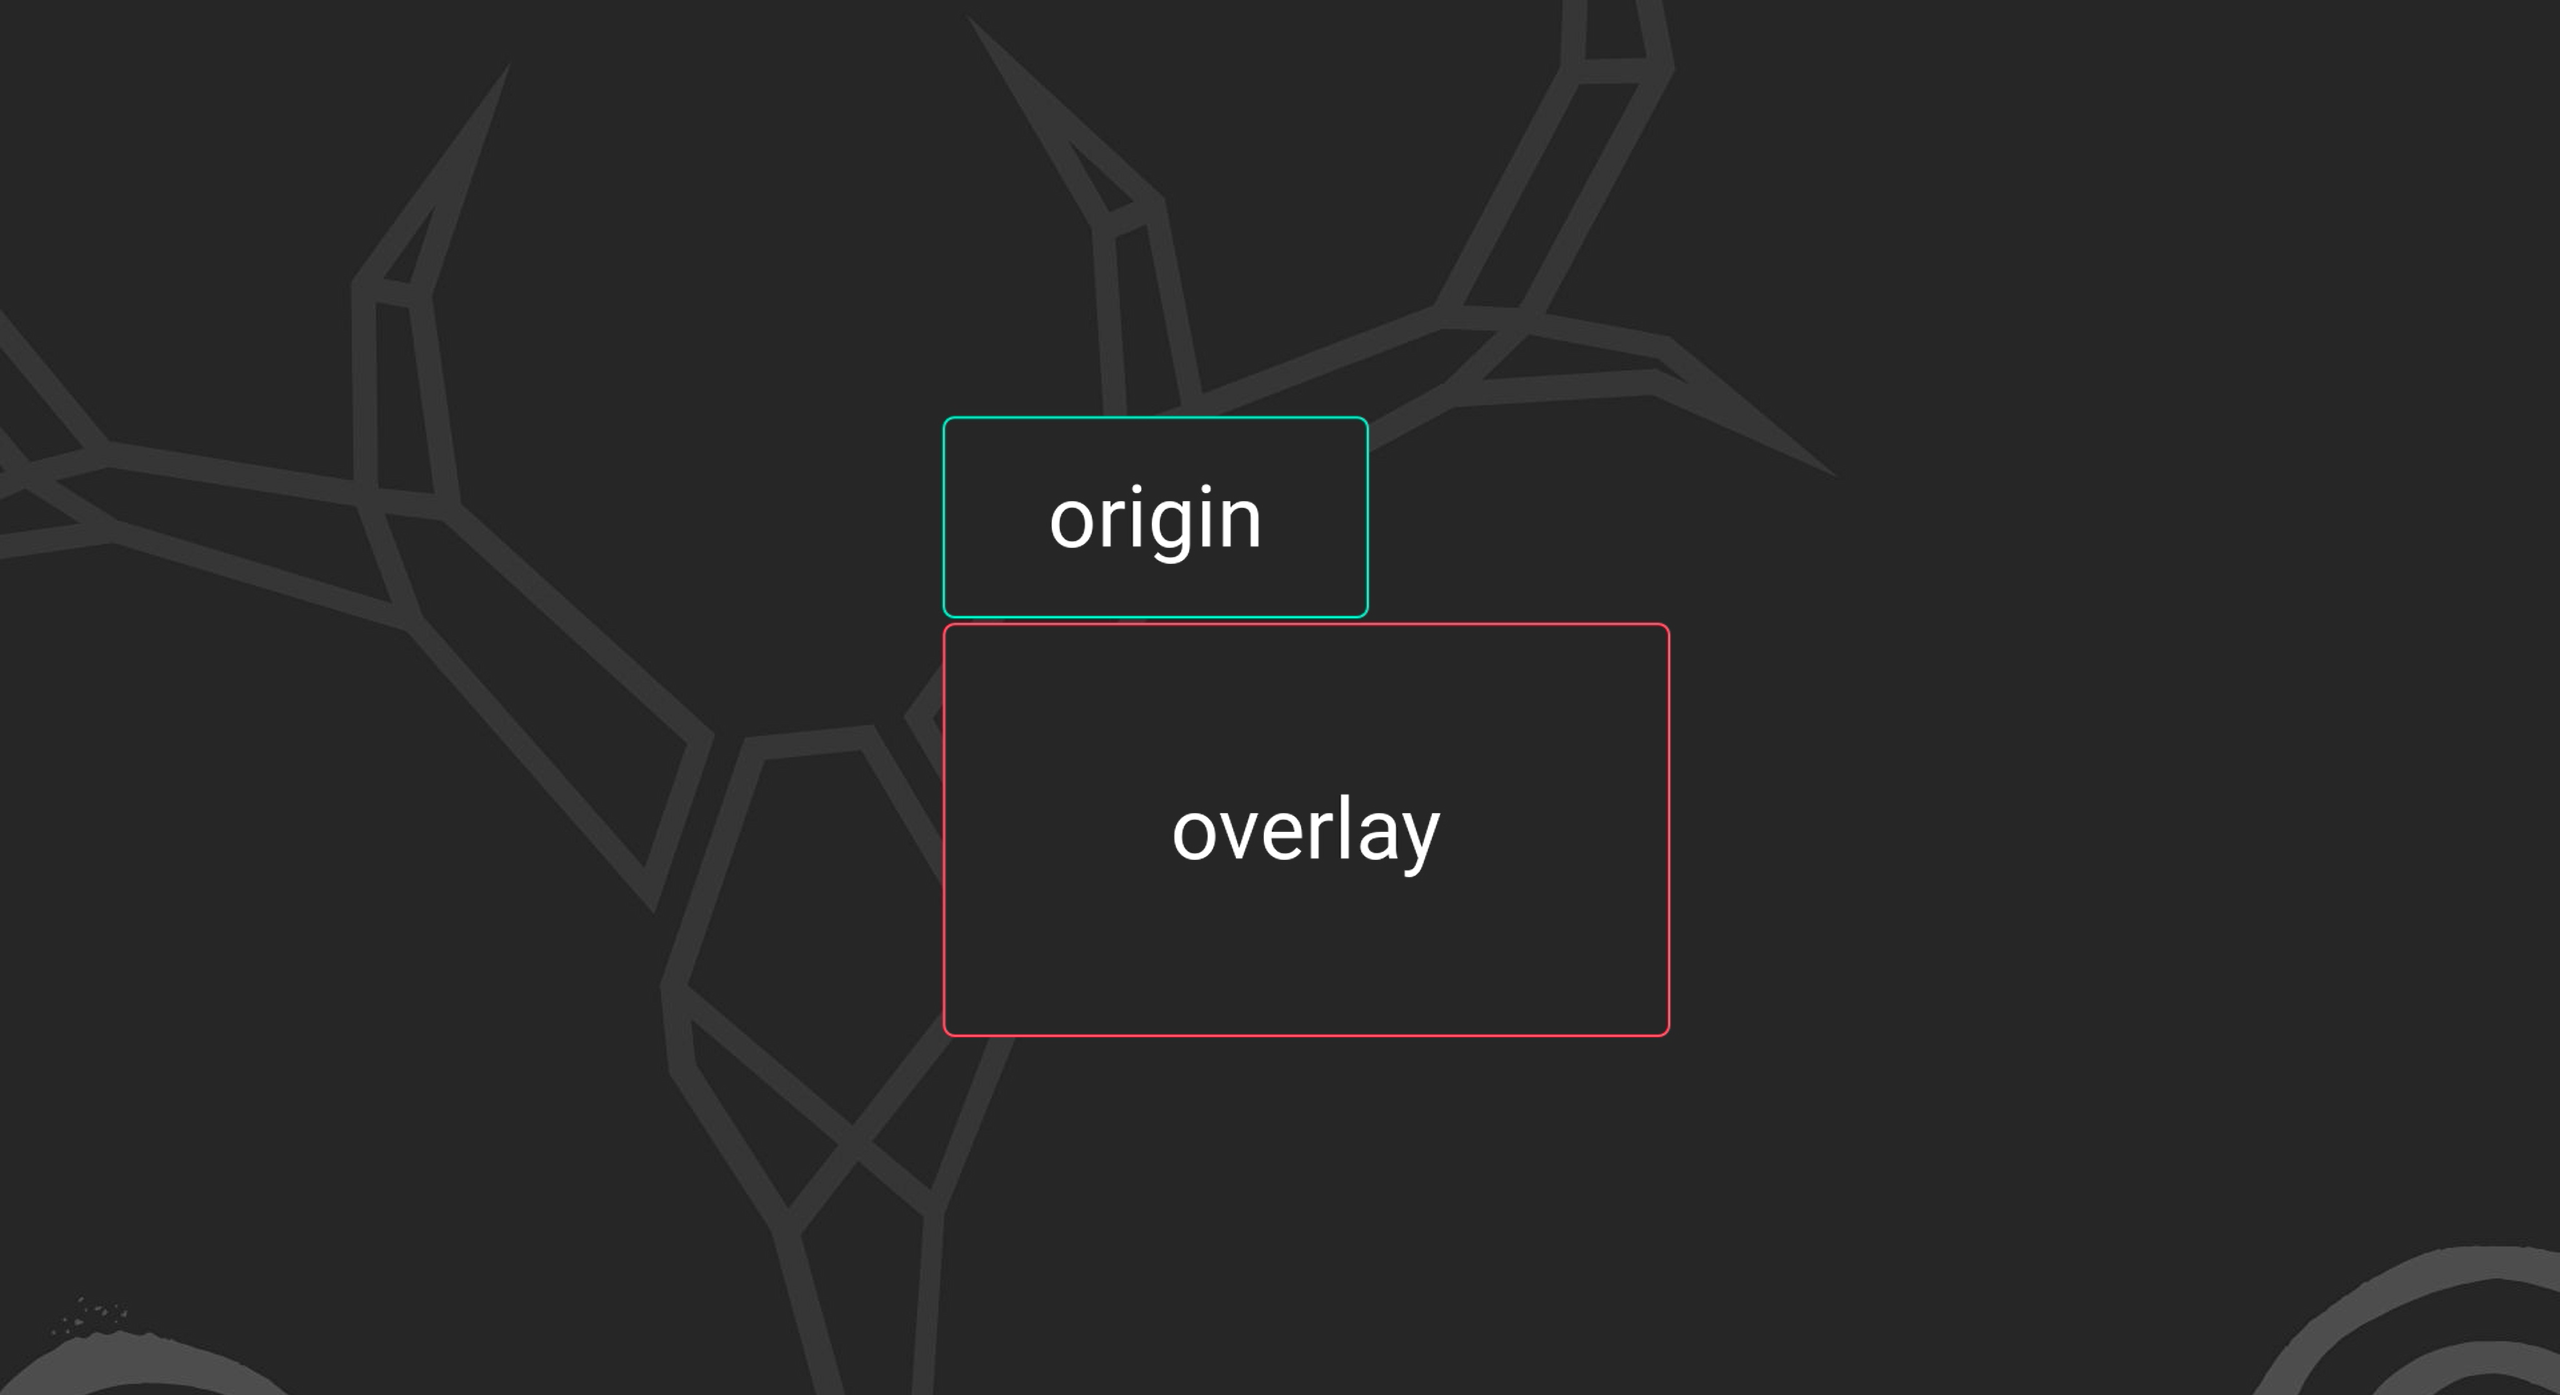
With the Overlay, we essentially define an attachment point on the origin, and then we define an attachment point on the overlay. Then, it will attempt to position the overlay based on these attachment points.
Understanding the CDK ConnectedPositionPair and How it’s Used to Create Overlay Positions
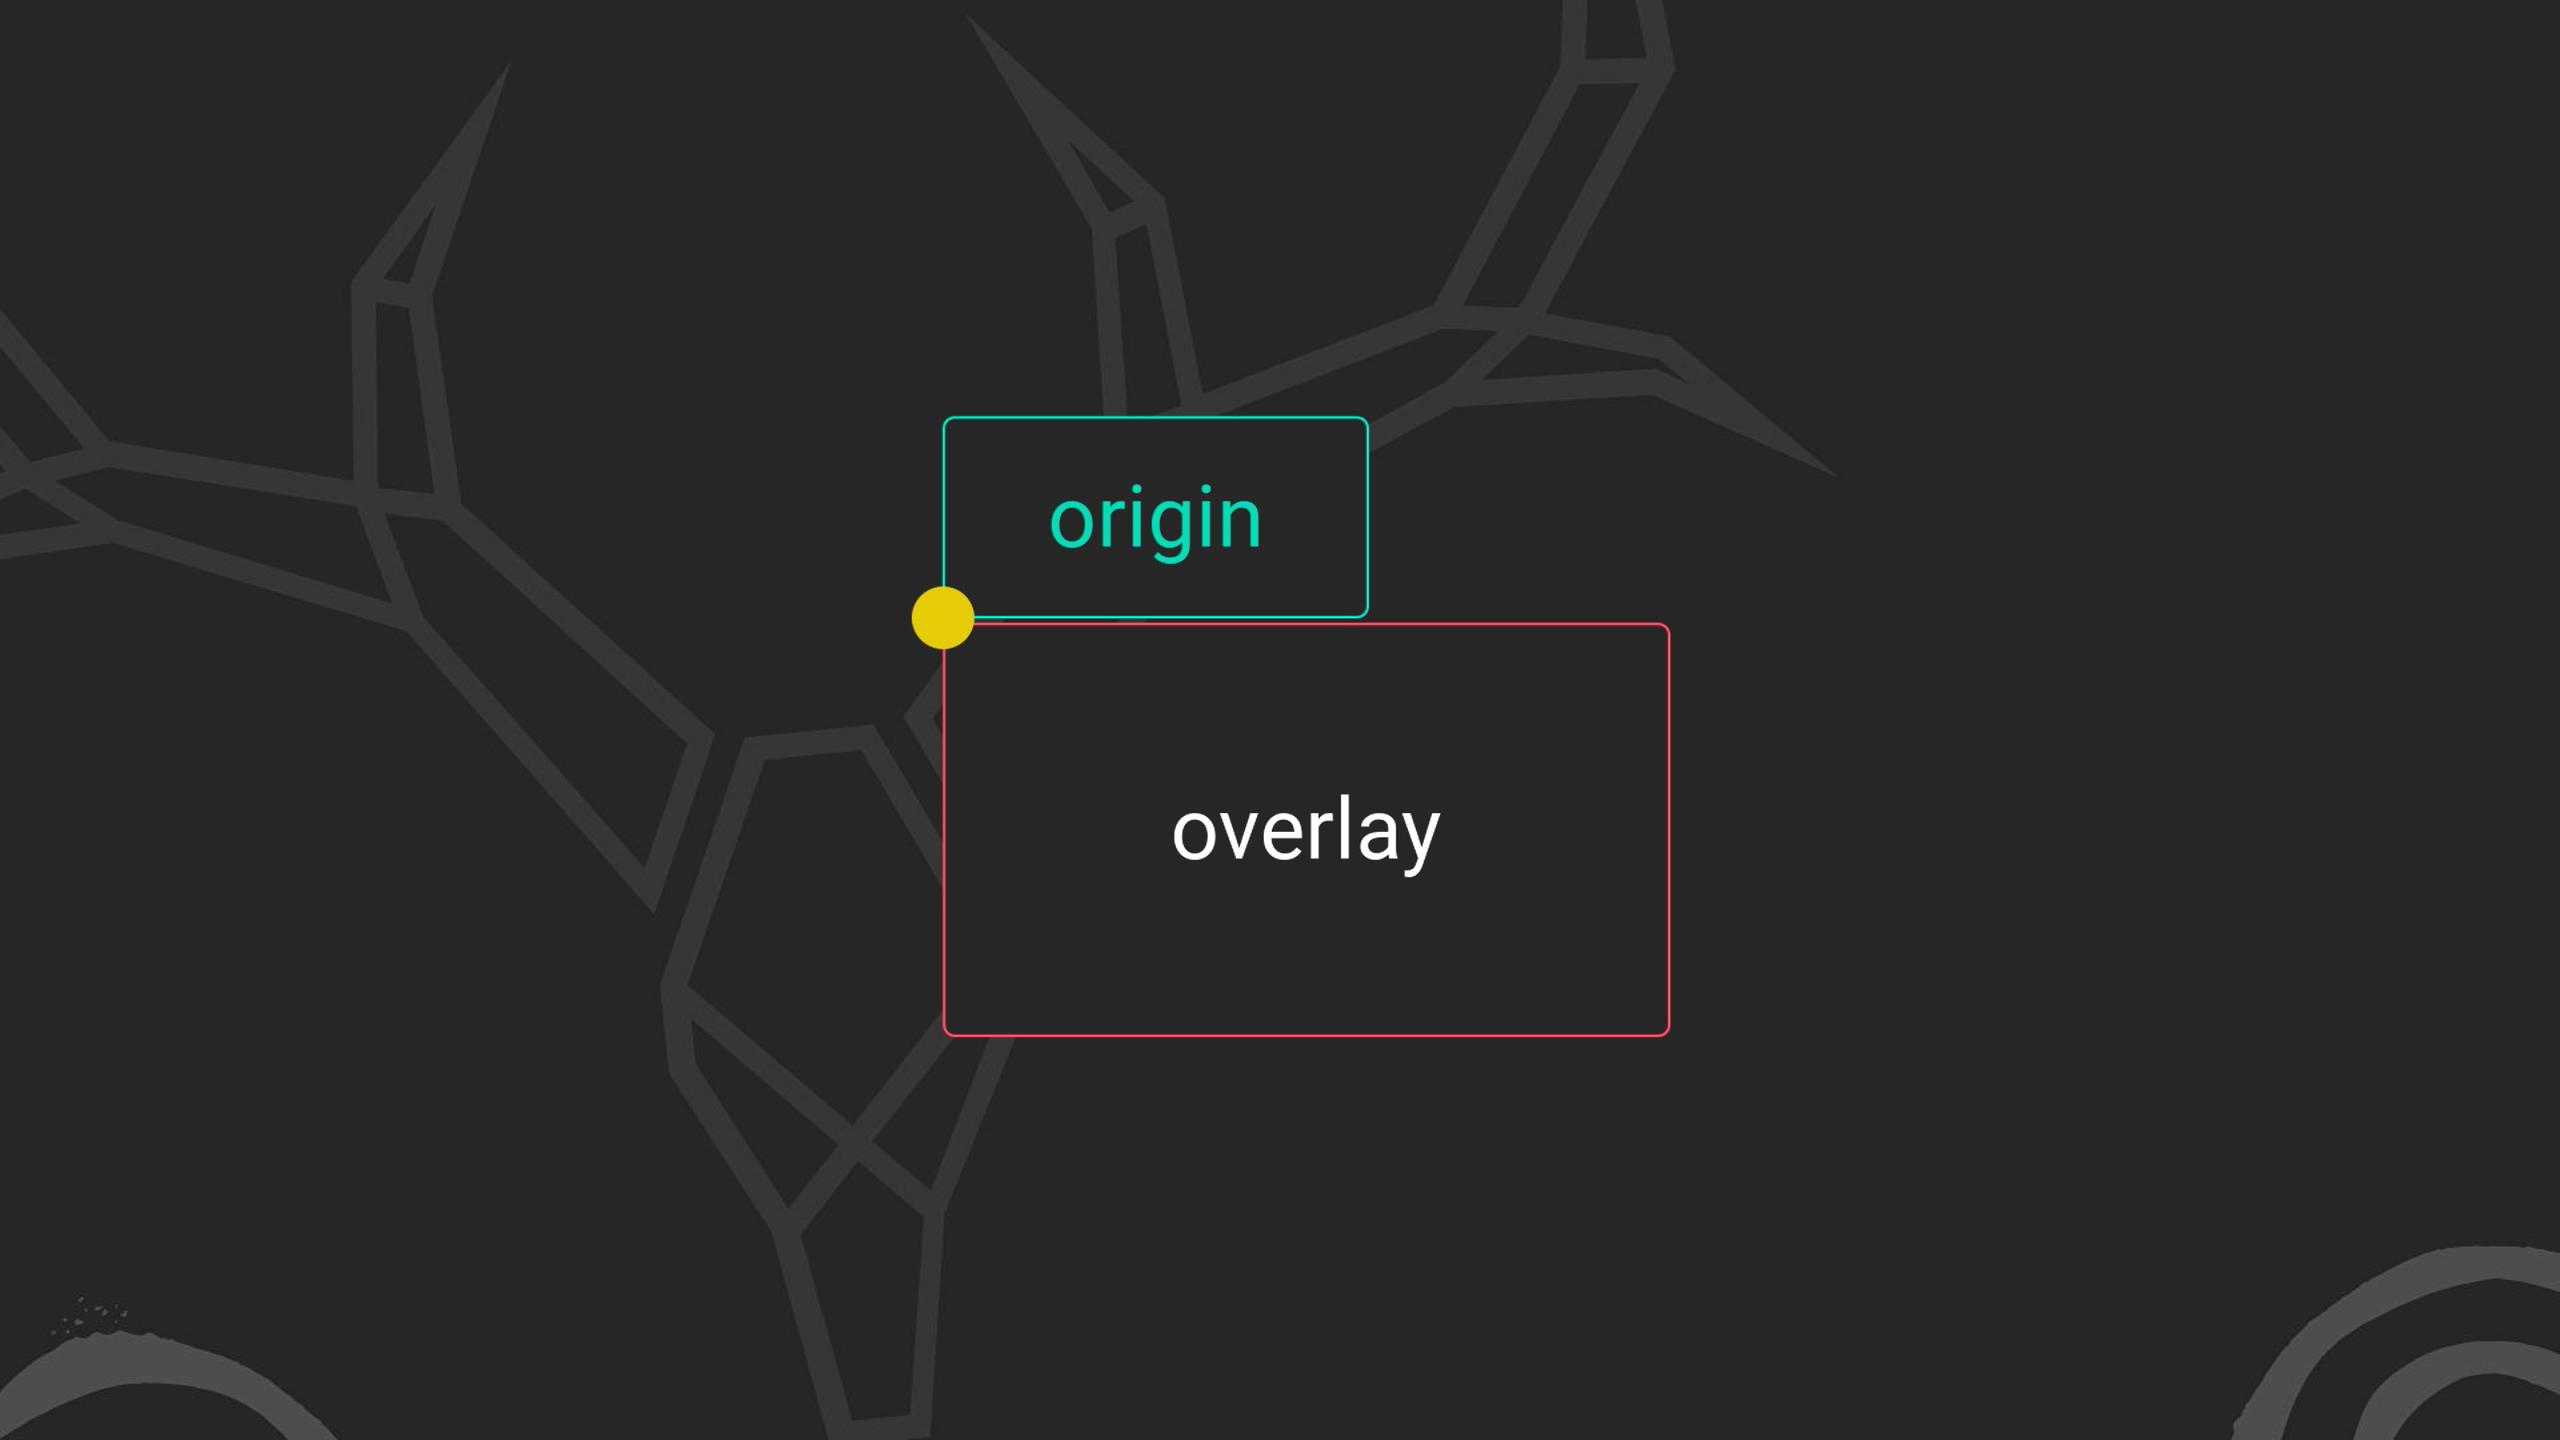
Essentially the attachment point for the overlay gets placed at that point on the attachment point for the origin. These attachment points are created with an object known as a ConnectedPositionPair. The most important properties of this object are:
- originX
- originY
- overlayX
- overlayY
These are what make up the attachment points for both the origin and the overlay. When dealing with the x-axis, the possible values are:
originX and overlayX Possible Values
- “start”: The left most edge of either the origin or overlay
- “center”: The horizontal midpoint of either the origin or overlay
- “end”: The right most edge of either the origin or overlay
And for the y-axis, the possible values are:
originY and overlayY Possible Values
- “top”: The topmost edge of the origin or overlay
- “center”: The vertical midpoint of the origin or overlay
- “bottom”: The bottom most edge of the origin or overlay
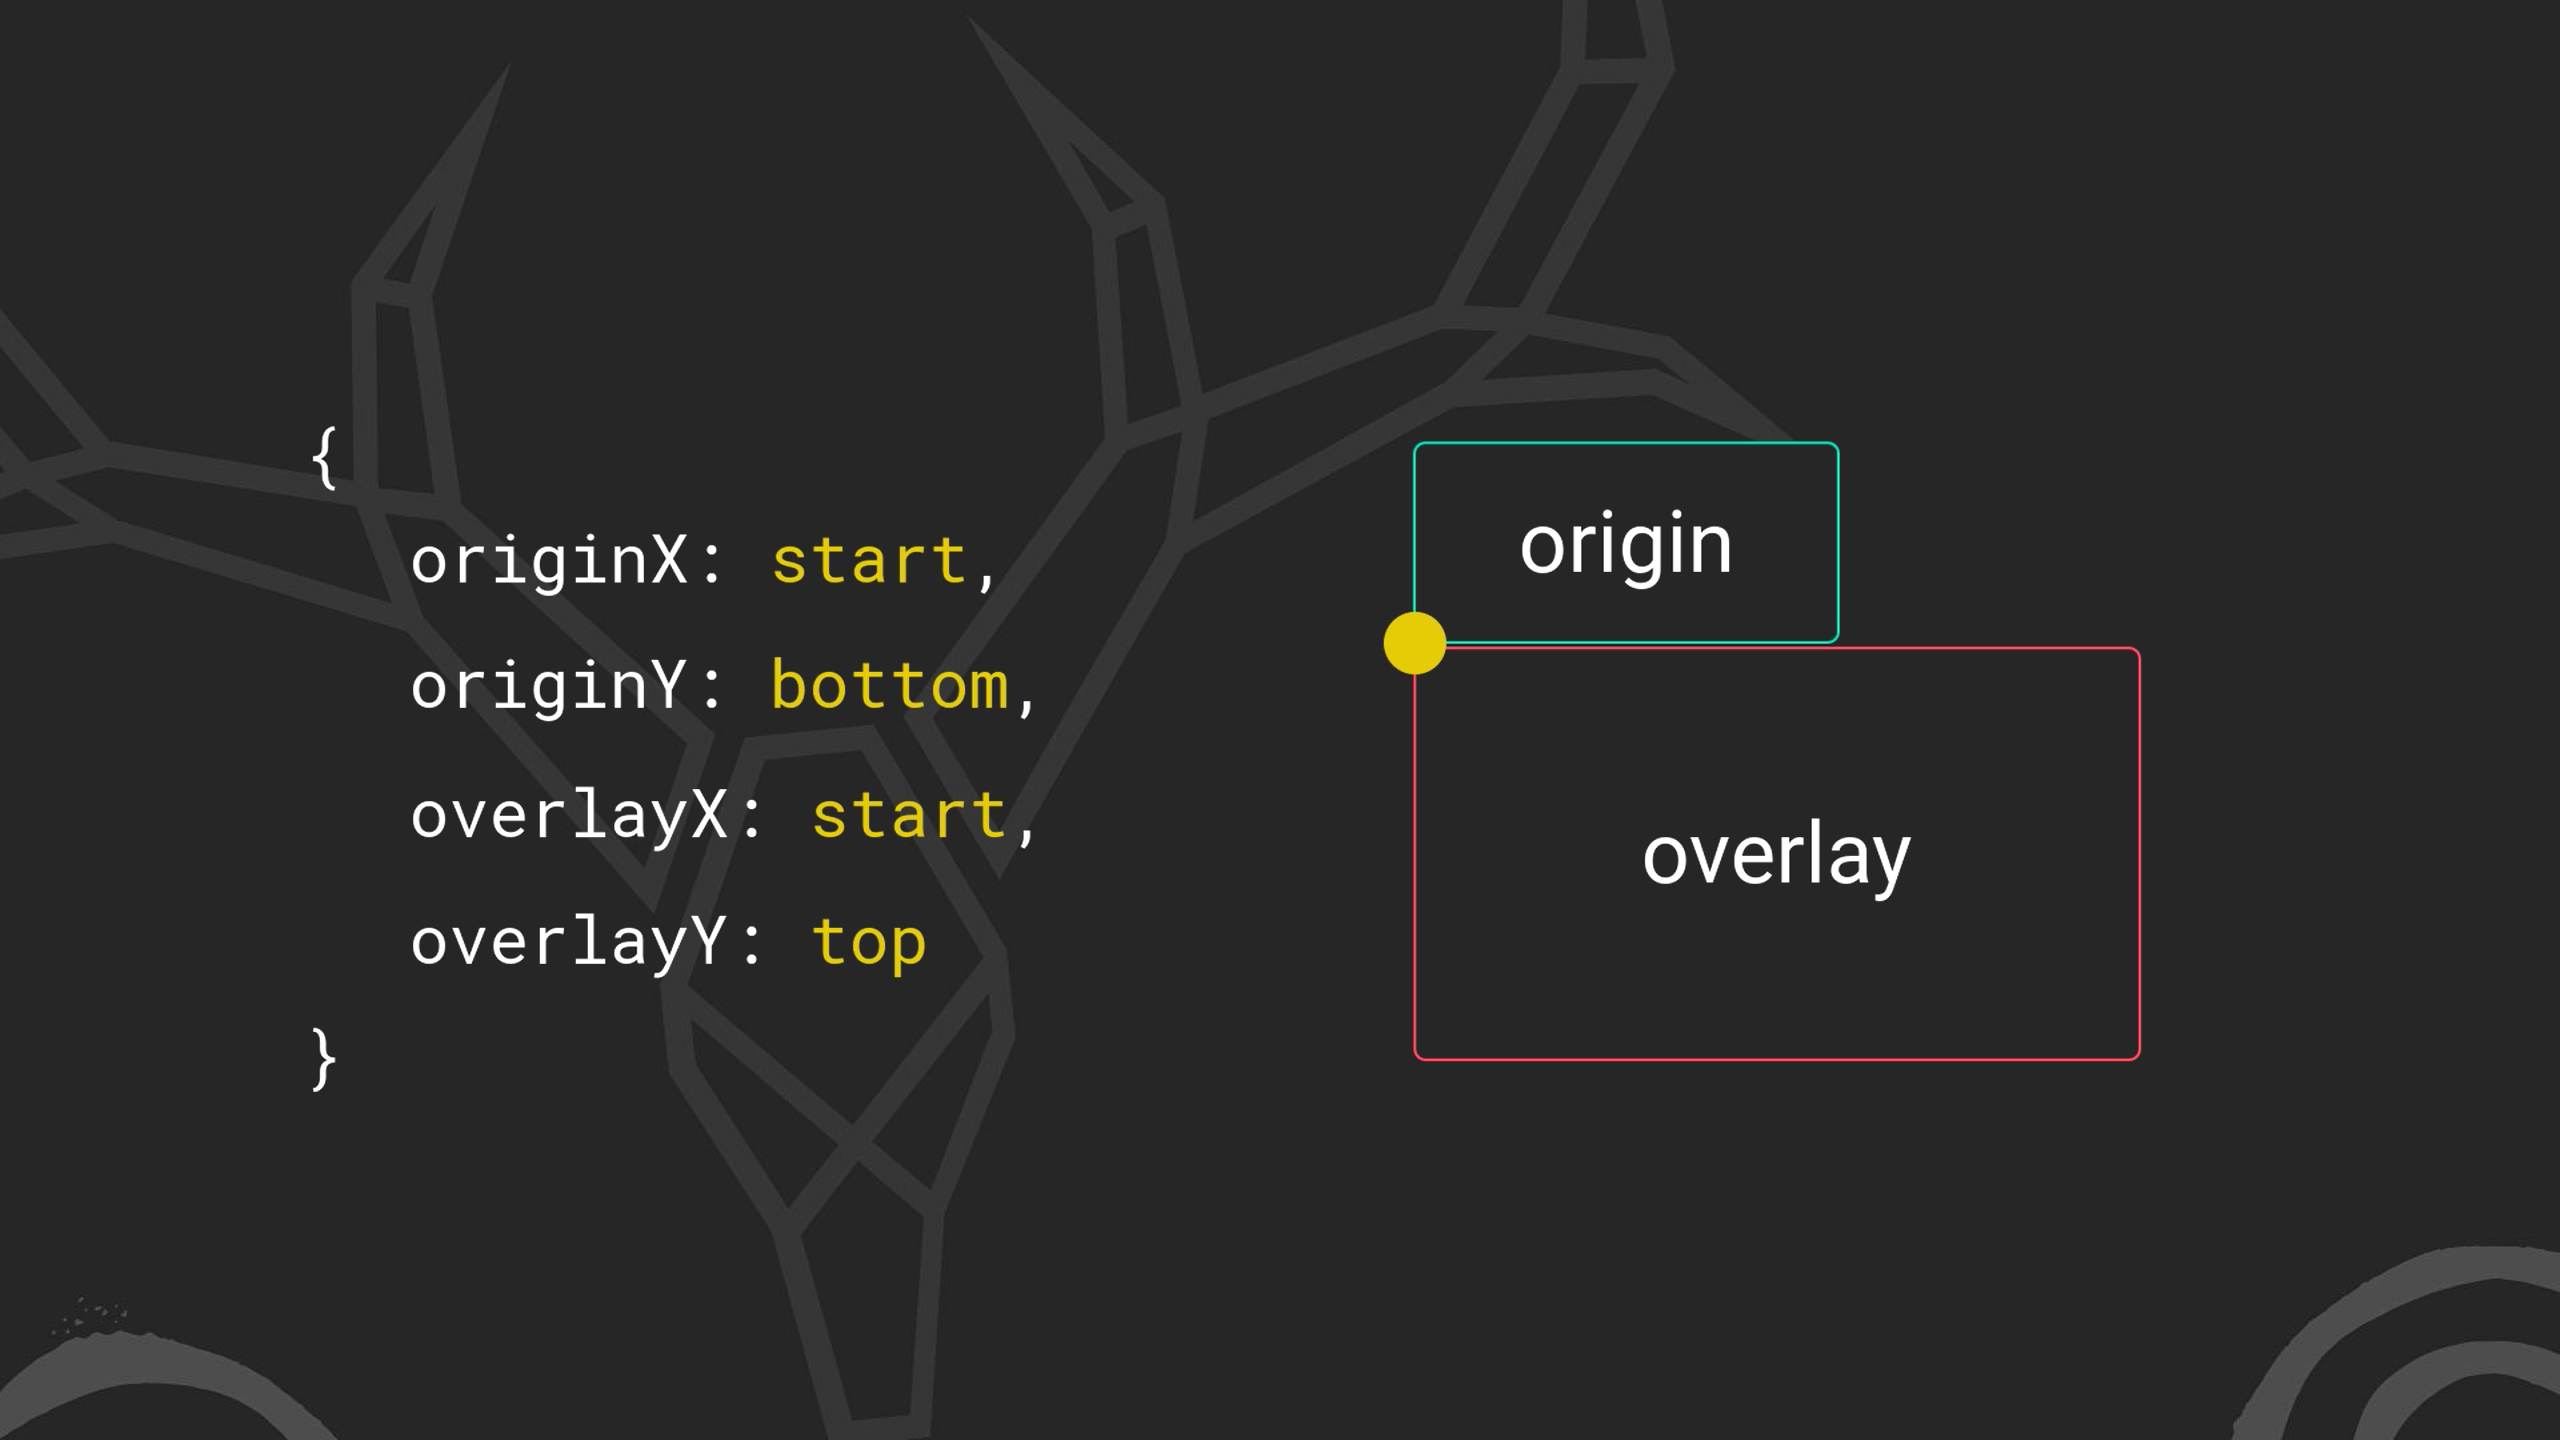
So, for example, a value of originX: start, originY: bottom, overlayX: start, and overlayY: top would result in an overlay with its top left corner attached to the bottom left corner of the origin.
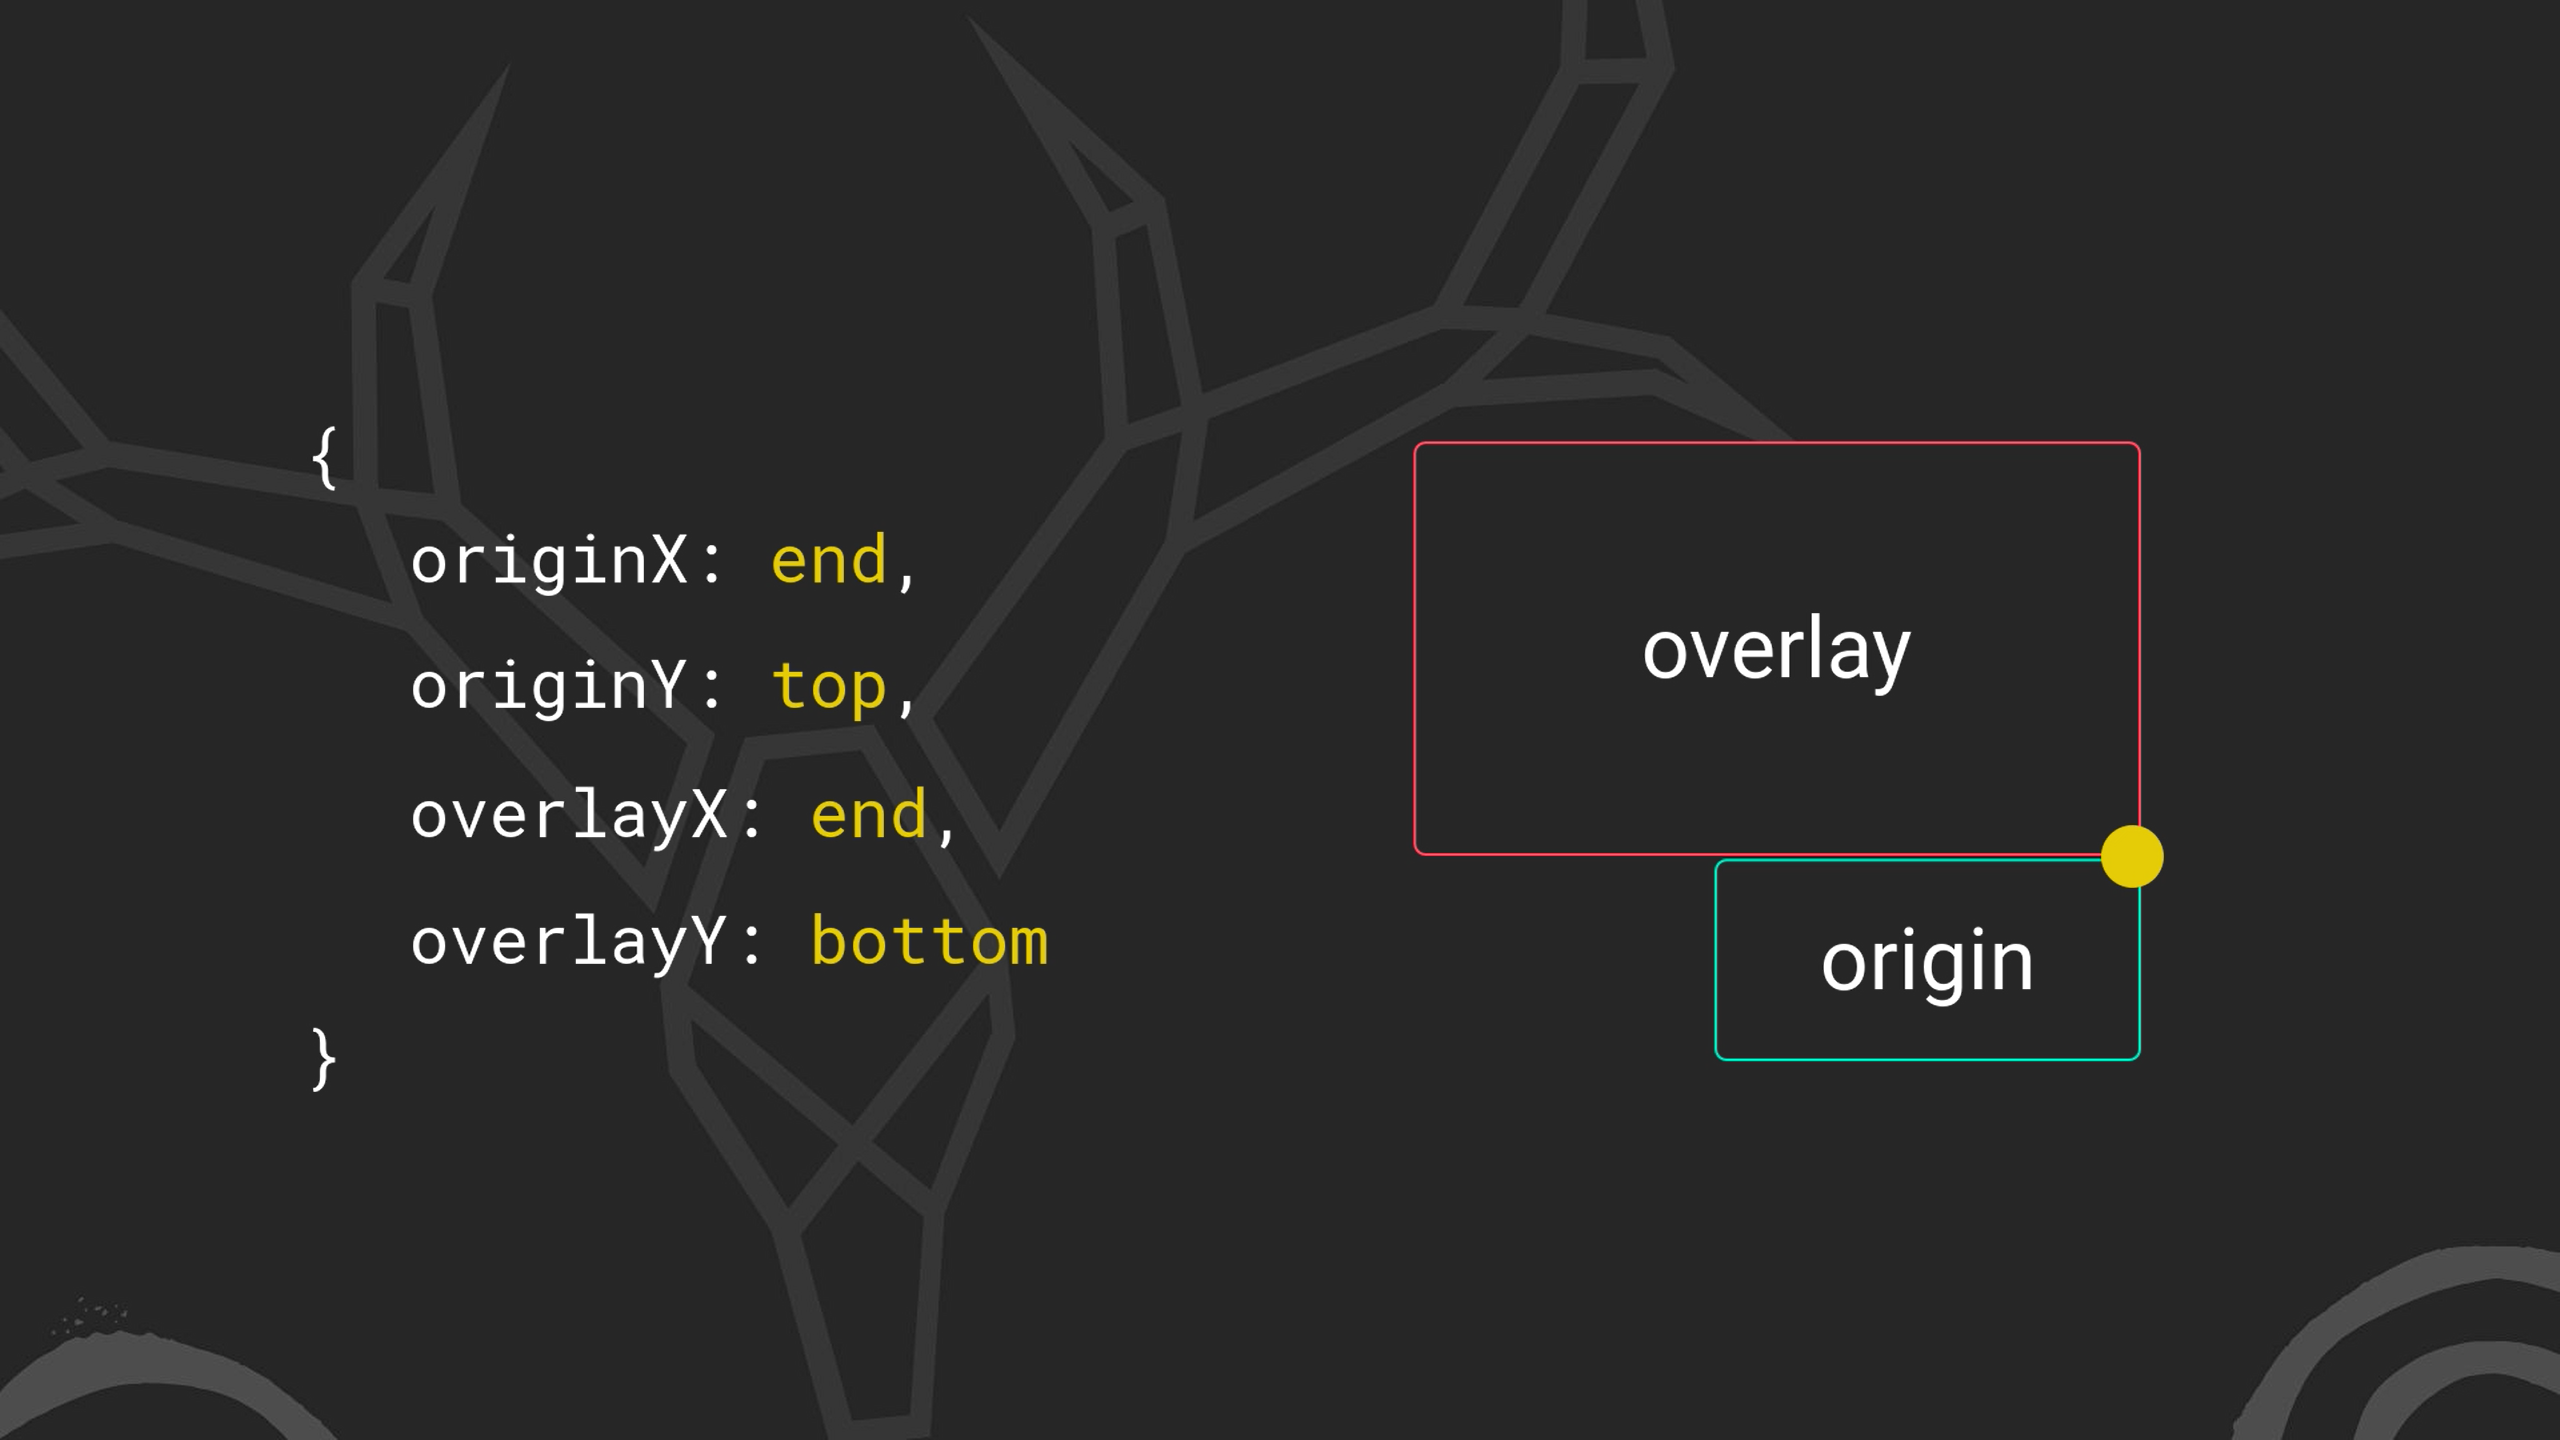
To contrast, a value of originX: end, originY: top, overlayX: end, and overlayY: bottom would result in an overlay with its bottom right corner attached to the top right corner of the origin.
How Fallback Positions Work With the CDK Connected Overlay
So, what we do is pass an array of these connected position pairs to the overlay in the order that we prefer to have them applied. The overlay will then attempt to position itself in the first position, but if it can’t fit within the viewport, it will fall to the next position. And, if that doesn’t fit it will fall to the next position.

Now, if none of the positions fit, it will determine which one fits best and then use it. So, there’s quite a lot of complexity there that we just don’t need to worry about. It’s all been figured out for us already.
The cdkConnectedOverlay Directive Default Positions
It’s important to note that when using the cdkConnectedOverlay directive like we will in this post, there are four default positions provided that mimic a standard dropdown:
- From the left downward
- From the left upward
- From the right downward
- From the right upward
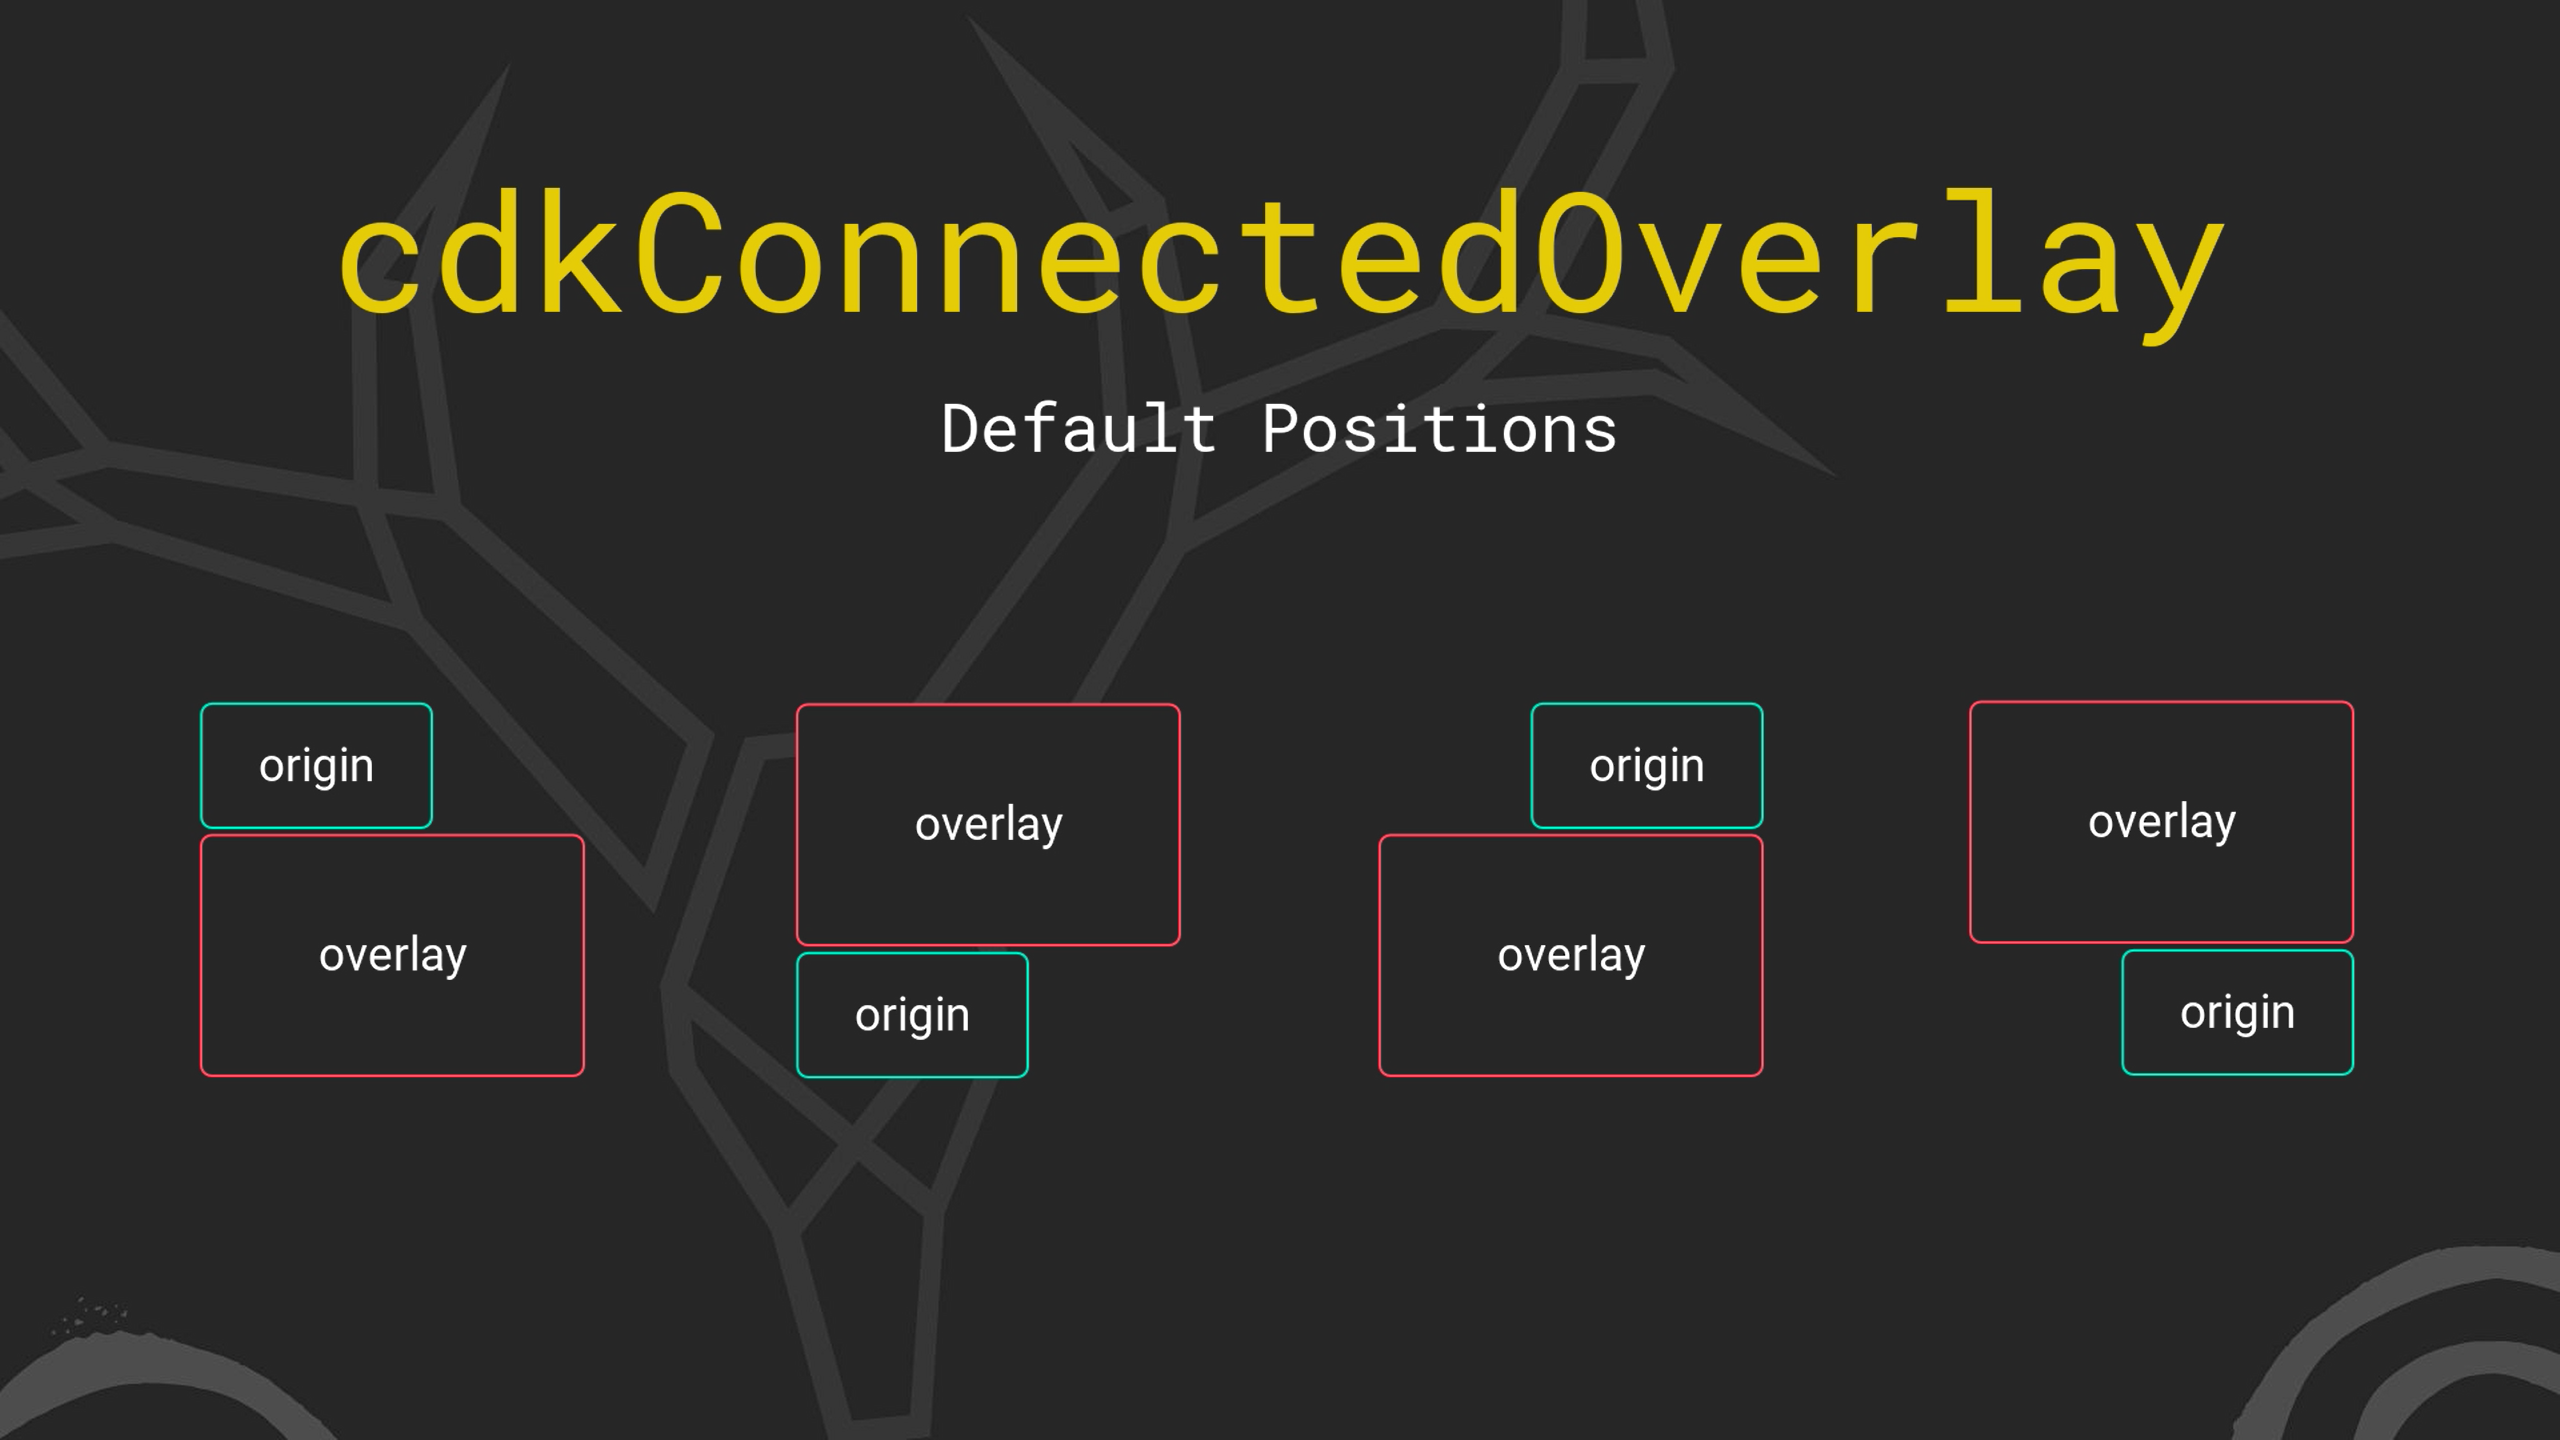
So, if you don’t need anything different, you won’t need to provide any positions yourself.
Ok, how about an example? Here, we have this app listing out some notable NBA players. And when we click the button on the side, we have the pop up that we created in the previous post on the overlay that shows more information about each player.

We can see that it’s opening from the right edge downward because it’s the only position that works for this particular item. And if we open a pop-up for an item lower in the list, it will open from the right edge upward because, in this case, it’s the only position that works.
Providing a Custom Position to the cdkConnectedOverlay Directive Using the cdkConnectedOverlayPositions Input
But what if we prefer for the pop-up to open vertically centered from the left edge? Well, this would mean that we need to provide our own custom positions. For this we need to use the cdkConnectedOverlayPositions input. This input accepts an array of position pairs.
So, we’ll add an object. Our originX value will be “start” to position from the left edge. Our originY value will be “center” to position from the vertical midpoint. Our overlayX will be “end” to position from the right edge. And our overlayY value will be “center” to position from the vertical midpoint of the overlay.
<ng-template
    cdkConnectedOverlay
    ...
    [cdkConnectedOverlayPositions]="[
        {
            originX: 'start',
            originY: 'center',
            overlayX: 'end',
            overlayY: 'center'
        }
    ]">
    ...
</ng-template>
Nice, so now it’s opening with the overlay centered to the left of the origin.
But I think we need a few more positions because the ones at the top and bottom will get cut off if they don’t fit within the viewport. So, we need to add another position that will open from the left top downward, and we need to add a position that will open from the left upward.
Providing Fallback Positions When Needed
So, we’ll add another object with originX “start”, originY “top”, overlayX “end”, and overlayY top. This will fix our issue for items at the top.
<ng-template
    cdkConnectedOverlay
    ...
    [cdkConnectedOverlayPositions]="[
        {
            originX: 'start',
            originY: 'center',
            overlayX: 'end',
            overlayY: 'center'
        },
        {
            originX: 'start',
            originY: 'top',
            overlayX: 'end',
            overlayY: 'top'
        }
    ]">
    ...
</ng-template>
Then, we’ll add another object for our bottom position where we’ll use originX “start”, originY “bottom”, overlayX “end”, and overlayY “bottom”.
<ng-template
    cdkConnectedOverlay
    ...
    [cdkConnectedOverlayPositions]="[
        {
            originX: 'start',
            originY: 'center',
            overlayX: 'end',
            overlayY: 'center'
        },
        {
            originX: 'start',
            originY: 'top',
            overlayX: 'end',
            overlayY: 'top'
        },
        {
            originX: 'start',
            originY: 'bottom',
            overlayX: 'end',
            overlayY: 'bottom'
        }
    ]">
    ...
</ng-template>

Nice, the one at the top opens downward like we want, the one at the bottom opens upward, and the pop-ups that can be centered will remain centered.
How to Add an X and Y Offset to an Overlay When Defining a Custom Position
Something else we can do here is we can offset the overlay on both the x and y axis. Right now, the right edge of our pop-up butts into the left edge of our origin. Let’s say we want to push it ten pixels away from the origin so that there will be some space between them. To do this we can add an offsetX property to all of our positions. Since we want to offset to the left ten pixels, we’ll add a value of negative ten.
<ng-template
    cdkConnectedOverlay
    ...
    [cdkConnectedOverlayPositions]="[
        {
            ...
            offsetX: -10
        },
        {
            ...
            offsetX: -10
        },
        {
            ...
            offsetX: -10
        }
    ]">
    ...
</ng-template>
This will move our overlay backwards, away from the origin element. We can also add an offset in the y direction with the offsetY property. Let’s offset our upward overlay negative ten pixels as well. This will push it up from the bottom edge of the origin.
<ng-template
    cdkConnectedOverlay
    ...
    [cdkConnectedOverlayPositions]="[
        {
            ...
            offsetX: -10
        },
        {
            ...
            offsetX: -10
        },
        {
            ...
            offsetX: -10,
            offsetY: -10
        }
    ]">
    ...
</ng-template>
Nice, so this overlay is now offset to the left, away from the origin. And the overlay at the bottom is offset up ten pixels as well.
How to Push an Overlay Into the View When it Doesn’t Fit Using the cdkConnectedOverlayPush input
Another issue that we have is that Kareem’s pop-up gets cut off because it has a lot of content doesn’t fit within the viewport no matter which direction it opens.

Well, the cdkConnectedOverlay directive has an input that will allow us to push this pop-up into the view when it doesn’t fit. To do this we add the cdkConnectedOverlayPush input and give it a value of true.
<ng-template
    cdkConnectedOverlay
    ...
    cdkConnectedOverlayPush="true">
    ...
</ng-template>

Now when we open Kareem’s pop-up again, it’s been pushed downward to reveal all of the content. How cool is that?
Ensure Space Between the Overlay and the Viewport With the cdkConnectedOverlayViewportMargin Input
Something that I don’t love about this though is that the pop-up runs right into the top edge of the viewport.
But, guess what? We can fix this with another input. We can use the cdkConnectedOverlayViewportMargin input. Let’s give it a value of seven pixels.
<ng-template
    cdkConnectedOverlay
    ...
    [cdkConnectedOverlayViewportMargin]="7">
    ...
</ng-template>
Nice, so now it opens with some space.That feels better, right? So, hopefully this deep dive into Connected Overlay position concepts has been helpful. Keep an eye out for future posts on other aspects of the Overlay Module.
Want to See It in Action?
Check out the demo code and examples of these techniques in the in the stackblitz example below. If you have any questions or thoughts, don’t hesitate to leave a comment.
Found any of this Stuff Helpful?
If you found any this helpful and want to show some love, you can always buy me a coffee!