Angular Animations Tutorial: Start and Done Events
When did you last need use an animation feature in your application? It’s something you probably do on a regular basis, if not daily. With Angular, we have a powerful animation framework that we can leverage to do all sorts of crazy things. Sometimes, when using these animation features, we need to do things when the animation starts, or when it ends, or both. Well, good news for us – we have this ability in Angular.
What exactly does Angular give us? We have the animation “start” and “done” events that fire at those times, and this allows us to program against them as needed. In this week’s post, we’re going to learn how they work and how to use them. Alright, let’s get to it!
Before We Get Started
Before we get too far along, it’s important to note here that I’ve already created several posts focused on the Angular animation framework. They cover the basics of setting up and using Angular animations, creating state-based and :enter/:leave animations, and using the keyframes(), query(), and stagger() functions to create more complex animation sequences.
So, if any of those concepts are unfamiliar to you, you’ll probably want to check those posts out first so that you’re not lost in this one.
Angular CDK Overlay Tutorials:
I’ve also created an Angular Animations playlist on my YouTube channel to help make their corresponding videos easier to find, so check it out!
Ok, enough of that, onto the example for this post.
The Demo Application
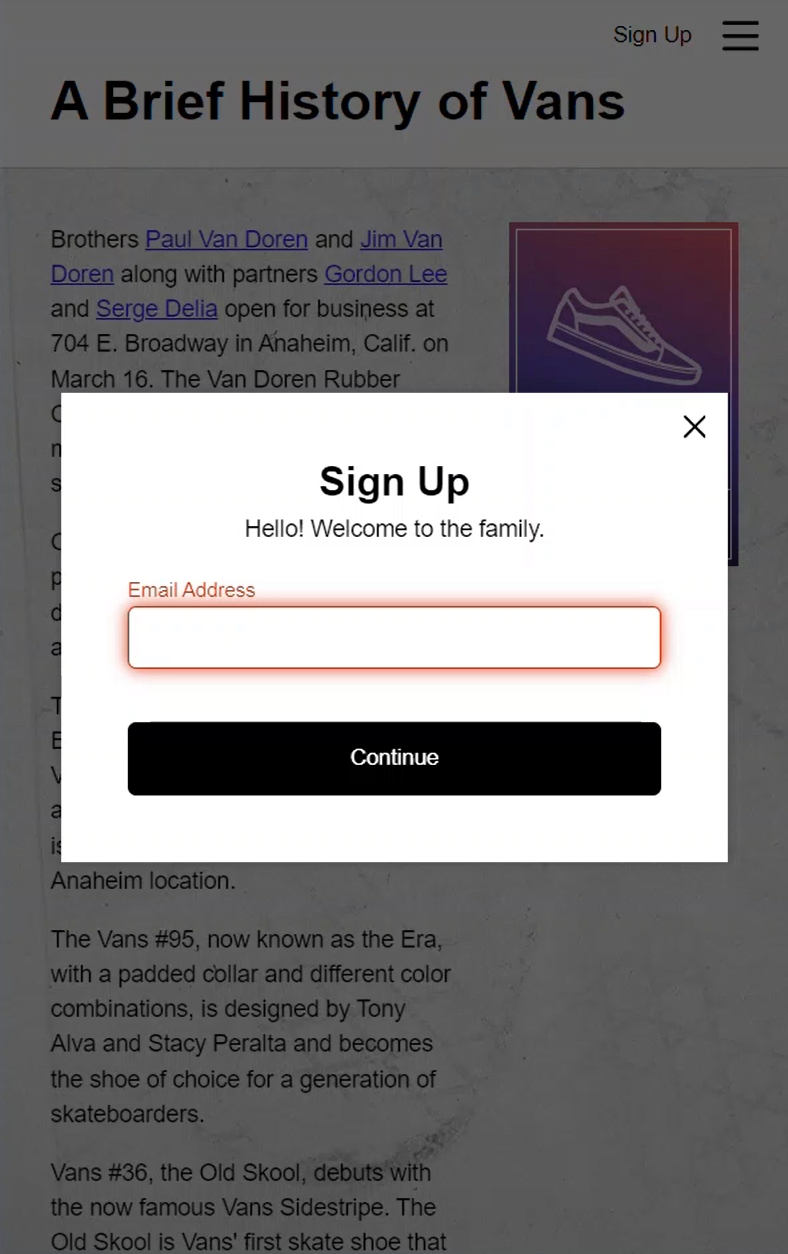
Here we have this demo application for the Vans shoe brand, and it has a sign-up form. Right now, when we click the button while the form is invalid, nothing happens to show there’s a problem with the information in the form fields. This isn’t very helpful for the user – it would be better if it did something more obvious.
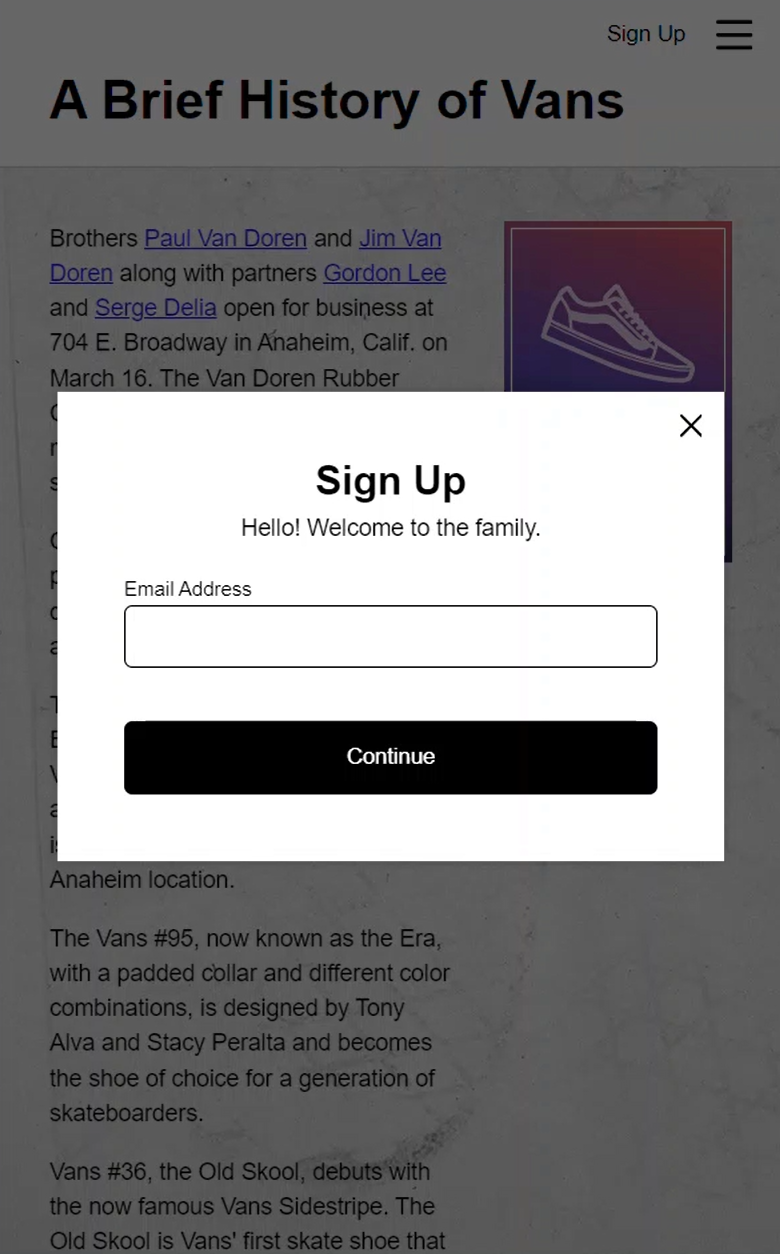
What if we could change the text color to red and make it wobble instead?
Well, that is exactly what we’re going to do in this post! Ok, let’s look at some code.
Adding the Wobble Animation with the Keyframes Function
All of the work we’re going to do for this demo will be done within the sign-up-form.component. Let’s start by adding the “wobble” animation. We’ll add the animations array to the component metadata. Within this array, we’ll add a trigger with the trigger() method, let’s call it “wobble”.
sign-up-form.component.ts
import { trigger } from '@angular/animations';
...

@Component({
    selector: 'app-sign-up-form',
    ...,
    animations: [
        trigger('wobble', [
        ])
    ]
})
Now, we’re going to use a boolean property to trigger this animation, so let’s add one called “wobbleField”, and let’s initialize it to false.
@Component({
    selector: 'app-sign-up-form',
    ...
})
export class SignUpFormComponent {
    protected wobbleField = false;
}
Now, within the trigger, let’s add a transition with the transition() function. We’ll want to run this animation only when changing the value of the wobbleField property from false to true, so we add that expression with false, arrow, true. Within this transition let’s add an animation using the animate() function. Let’s add an animation duration of point seven five seconds. This is how long the field will wobble back and forth after clicking the button.
import { ..., transition, animate } from '@angular/animations';
...

@Component({
    selector: 'app-sign-up-form',
    ...,
    animations: [
        trigger('wobble', [
            transition('false => true', [
                animate('0.75s')
            ])
        ])
    ]
})
To create the animation we’re going to use several keyframes, so let’s add the keyframes() function. Within this function, let’s add the style we’ll start with using the style() function. We’ll first move the field to the left so within this function, we’ll add a transform, and we’ll give it a value of translateX negative five percent. We’ll want it to be translated this distance ten percent of the way through the animation, so let’s add an offset of point one.
Alright, for this next keyframe, we want to push the field to the right, so well use a translateX value of positive five percent. We’ll want this to occur thirty percent of the way through the animation so let’s change the offset to point three.
Next we’ll add another translateX negative five percent keyframe with an offset of point five. Now let’s add another style and switch to a positive five percent, with an offset of point seven.
We’ll a dd another style and with a translateX value of negative five at an offset of point nine.
And, for the last keyframe, we’ll translate back to the original position at an offset of one.
import { ..., keyframes, style } from '@angular/animations';
...

@Component({
    selector: 'app-sign-up-form',
    ...,
    animations: [
        trigger('wobble', [
            transition('false => true', [
                animate('0.75s', keyframes([
                    style({transform: 'translateX(-5%)', offset: 0.1}),
                    style({transform: 'translateX(5%)', offset: 0.3}),
                    style({transform: 'translateX(-5%)', offset: 0.5}),
                    style({transform: 'translateX(5%)', offset: 0.7}),
                    style({transform: 'translateX(-5%)', offset: 0.9}),
                    style({transform: 'translateX(0)', offset: 1})
                ]))
            ])
        ])
    ]
})
So, that’s the animation; now we need to bind it to our field container in the template. On our label element we’ll add the @wobble trigger. We’ll bind this trigger to the wobbleFIeld property, and we’ll only want to trigger the animation when the form is invalid.
sign-up-form.component.html
<label [@wobble]="wobbleField && form.invalid">
    ...
</label>
The last thing we need to do is toggle the wobble field property. Here on the submit button, we can see that when this button is clicked, if the form is valid, we will emit that the form is submitted, otherwise nothing happens.
<button (click)="form.valid ? formSubmitted.emit() : null">
    ...
</button>
Let’s replace null with an expression where we set the wobbleField property to true instead.
<button (click)="form.valid ? formSubmitted.emit() : wobbleField = true;">
    ...
</button>
Now it will either submit the form or trigger our animation. So, at this point the wobble animation will properly run when we click the button. But if we try to trigger the animaiton a second time by clicking on the button again, it won’t run.
Well, tis is because we set our property to true when the button was clicked but, from there on out, it remains true, nothing switches it back. This is a good case for us to use the animation done event.
Using the Animation Done Event to Reset the Trigger Variable After the Animation Completes
When we use animations in Angular, we can access the done event by using event binding with parentheses. Then we add the trigger followed by a dot, then the word done. This will fire with an Angular AnimationEvent object when the animation completes.
Let’s bind to the done event on our wobble animation. When the animation is done, we want to switch our wobbleField property back to false.
<label
    [@wobble]="wobbleField && form.invalid"
    (@wobble.done)="wobbleField = false">
    ...
</label>
Now, let’s save and see how this looks.
Well, it still wobbles correctly the first time. And now, after it’s done, it wobbles again. Pretty cool!
Now we’re just missing one last piece. We want to highlight it red after the button is clicked when the animation starts. To do this we want to leverage a global “invalid” class that we have.
global_styles.css
label.invalid {
    color: red;
}

label.invalid input {
    border-color: red !important;
    filter: drop-shadow(0 0 0.375em red);
}
And, one possible way to do this is to use the animation start event.
Using the Animation Start Event to Bind a Global Class to the Animating Element
The Angular AnimationEvent object contians several pieces of information. For our example, we will be using two of these: the fromState and the element.
Alright, let’s see how.
What we want to do is add the “invalid” class to the label element that has our animation trigger, and we’re going to use the start event to do this. But, before we do, let’s add the function we’ll call on start that will do all of this for us.
Over in our sign-up form code, let’s add a function called “onWobbleStart”. This function will take in an event that will typed to an Angular AnimationEvent object. We’ll need to be sure not to confuse with the typescript AnimationEvent. It’s part of the animations module.
sign-up-form.component.ts
import { ..., AnimationEvent } from '@angular/animations';
...
@Component({
    selector: 'app-sign-up-form',
    ...
})
export class SignUpFormComponent {
    ...
    protected onWobbleStart(event: AnimationEvent) {
    }
}
Ok now, we are going to add a class to the element from the object and we’ll use the Renderer2 to do this, so let’s inject it in the constructor.
import { ..., Renderer2 } from '@angular/core';
...
@Component({
    selector: 'app-sign-up-form',
    ...
})
export class SignUpFormComponent {
    ...
    constructor(private renderer: Renderer2) {}
}
In our function, let’s use the renderer addClass() function. The first parameter is the element we are adding the class to, and the second is the class we want to add. I’m also going to log out the event here in case we need it to troubleshoot.
@Component({
    selector: 'app-sign-up-form',
    ...
})
export class SignUpFormComponent {
    ...
    protected onWobbleStart(event: AnimationEvent) {
        console.log(event);
        this.renderer.addClass(event.element, 'invalid');
    }
}
Now let’s add the start event in our template. Then we’ll call our onWobbleStart() function and pass it $event.
sign-up-form.component.html
<label
    [@wobble]="wobbleField && form.invalid"
    (@wobble.done)="wobbleField = false"
    (@wobble.start)="onWobbleStart($event)">
    ...
</label>
Ok, let’s save this and check it out.
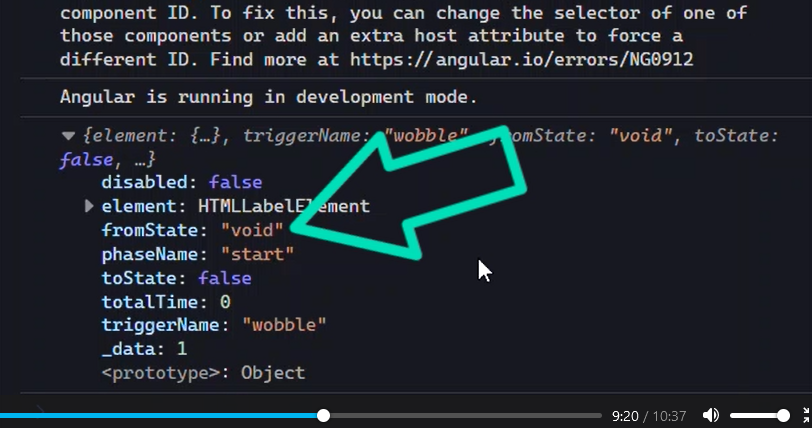
Huh, that’s strange, looks like the class is already getting added even though we haven’t triggered the animation. Well, this is a funny thing about animations – they start from a void state on initialization. Let’s take a look at the console so I can show you what I’m talking about.
Here we have the event that fired on initialization, and you can see that the from state is void.
Now, if I trigger the animation, we see two more events fire. One event fires to actually trigger the animation from false to true:
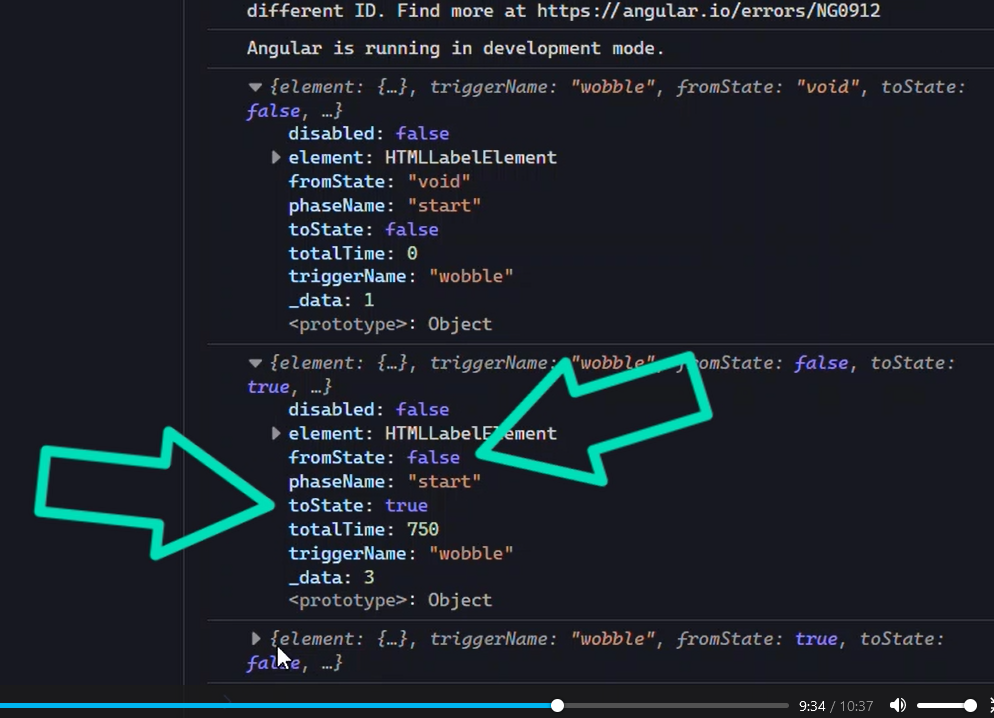
And, the other fires from true to false but that doesn’t trigger the animation:
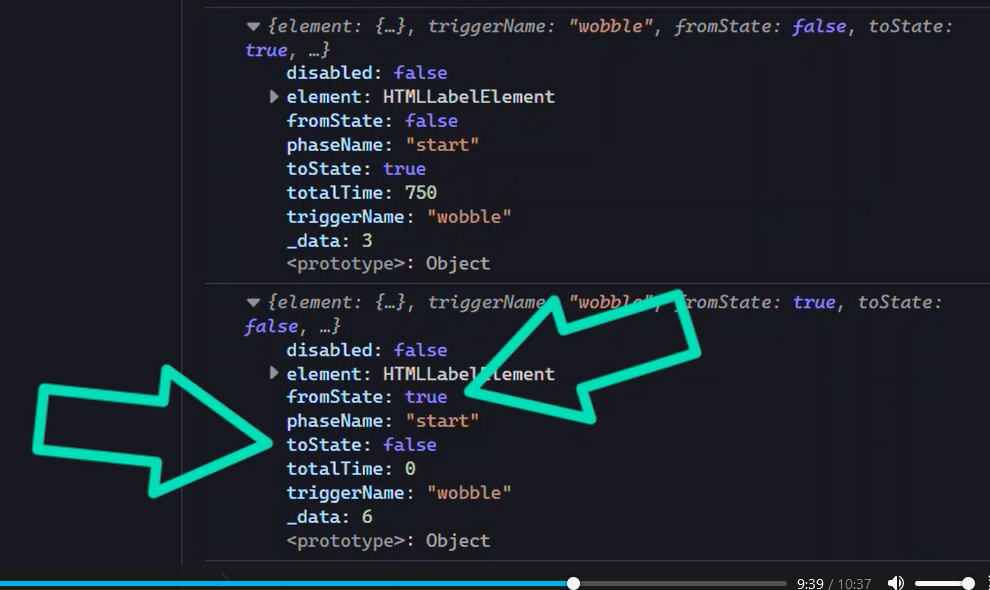
With that in mind, we need to change the logic in our function. We only really want to add the class if we’re not animating from a void state.
sign-up-form.component.ts
@Component({
    selector: 'app-sign-up-form',
    ...
})
export class SignUpFormComponent {
    ...
    protected onWobbleStart(event: AnimationEvent) {
        if (event.fromState !== 'void') {
            this.renderer.addClass(event.element, 'invalid');
        }
    }
}
Let’s save and check this out again.
So, it’s not added on initialization now, that’s good. And, it is properly added when the animation starts now too, nice.
Conclusion
So now you have yet another animation tool available. You won’t always need these events, but it’s nice to know about them for when you do.
Now remember, there’s still a lot to the animation framework, so I’ll go ahead and stop here for now. I’ll be creating several more videos on Angular animations very soon, so stay tuned!
Want to See It in Action?
Check out the demo code and examples of these techniques in the in the Stackblitz example below. If you have any questions or thoughts, don’t hesitate to leave a comment.
Found any of this Stuff Helpful?
If you found any this helpful and want to show some love, you can always buy me a coffee!